
I’ve been having a look at unit testing with C# recently, since I was going to try coding some stuff in C# I thought I might as well start with some good TDD practices. Along the way I found some inconsistencies, and some ideas, so I thought I’d share them here.
So first up, got my starting materials, for this exercise I was using:
- Visual Studio 2005 – no plugins or 3rd party kit, just the MSDN professional edition version.
- nUnit 2.4.3 – I got this from SourceForge as an MSI, the homepage is here if you’re after a different variant.
In theory the instructions should work for the VS Express editions, but I haven’t tried them, if you have, please add a comment below to share your experience.
Make a Start
I’m going to assume you’ve installed Visual Studio (VS), if not then the DVD and the MSDN website have a load of useful info on that.
To install nUnit I followed the instructions from their homepage, upto the point where you run the tests that come with the installation. So for the rest of this it is assumed you’ve got the Gui working with the nice green bar that implies your nUnit install is all in the right place (usually C:\Program Files\nUnit 2.4.3\ if you pick the defaults). It is worth having the nUnit tutorial open in a browser, this is usually installed as a menu item on the Start Menu (C:\Program Files\NUnit 2.4.3\doc\quickStart.html if you’ve used the defaults).
A new Solution…
Before this point the only IDE I’d used in much anger was Eclipse, which I quite like, although I’m still one of those people who likes fiddling with the makefiles. Now from that point of view, a Project is the thing you’re building.
Well not quite in VS, a Project is a sub-set of a “Solution”, and a Solution can have many Projects. A Project may also be shared amongst many Solutions.
So with this in mind, I came up with a method to separate my test code from my “real” code, so that when I release it, I’m not bundling all the unit tests with it.
Real Project vs Test Project
At the moment I’m creating an Assembly (DLL), and as a test I’ve put a Calculate class in it.
The real code is in: democode.Calculate and the test code is in: test.democode.TestCalculate.
The democode namespace is in the “Real” project, and the test.democode namespace is in the “Test” project.
In the Real Project, you need to create your democode.Calculate class:
1: using System;2: using System.Collections.Generic;3: using System.Text;4:5: namespace democode6: {7: public class Calculate8: {9: /*10: * Add two numbers11: */12: public int add(int a, int b)13: {14: return a + b;15: }16:17: /*18: * Subtraction19: */20: public int subtract(int a, int b)21: {22: return a - b;23: }24: }25: }26:
In the Test Project, you need to add a Reference to the nunit.framework by right clicking on the References section for that Project and going through the “Add Reference” dialog. Then we can add a test:
1: using System;2: using System.Collections.Generic;3: using System.Text;4: using NUnit.Framework;5: using democode;6:7: namespace test.democode8: {9: [TestFixture]10: public class TestCalculate11: {12: [Test]13: public void testAdd()14: {15: Calculate c = new Calculate();16: Assert.AreEqual(4, c.add(2, 2));17: }18:19: [Test]20: public void testSubtract1()21: {22: Calculate c = new Calculate();23: Assert.AreEqual(2, c.subtract(4, 2));24: }25:26: [Test]27: public void testSubtract2()28: {29: Calculate c = new Calculate();30: Assert.AreEqual(-2, c.subtract(2, 4));31: }32: }33: }34:
For an explanation of the code and guidance I followed the tutorial, however there are a couple of inconsistencies, the library suggests using the Assert class with the static methods, rather then “AssertEquals”.
Run the Tests!
Now at this point it has to be said I missed the relative simplicity of the jUnit test framework in eclipse which has integrated the Gui into the IDE to give you a quick way of switching between the tests and the code and also running the tests with the famous “Green Bar”.
For NUnit I found this a bit more difficult, the configuration defeated me somewhat, so I’ve opted for (hopefully) a simpler solution:
Under the Visual Studio “Tools” menu, click on “External Tools…”, when the dialog pops up, hit “Add”. Then add a new option of the NUnit Gui and fill out the arguments to point to the nunit exe and the Project Directory and the Project Filename (the .cproj file) using the Visual Studio variables. See example below:

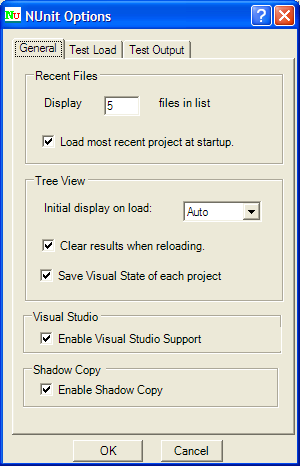
Note that this works only if you have ticked the Visual Studio support option in the NUnit menu under Tools -> Options…, as below:
Now, in the Visual Studio IDE, whenever you want to run the tests for your project, simply go to the Tools Menu and Select NUnit Gui, and hit “Run”.
Addendum
Proof that you should document these things, having done this and forgotten about it, I had need of it again recently, and being able to just use the menu option made life a lot easier. While I’m at it, much kudos to Leo Vildosola for his Code Snippet Plugin, without which the code would look pretty bad, it also means I don’t have to make good on my previous post as frankly his work is a lot better.


